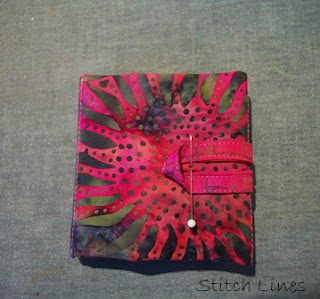
I made up this little item on the weekend, from directions a quilting friend gave me a few years ago. And then I thought, I wonder if others would like a little tutorial on how to make this cute little giftie item... Can you guess what it is?
No, it's not a Needle Book... It's a Tea Caddy- for those who carry their own tea bags. Are you a tea drinker? If so, you might like one of these to pop in your purse or totebag, or you might want to make some for a few of your tea-drinking friends. It is very quick and easy, and holds up to six teabags.
All you need (other than your sewing machine, thread, marking pencil and pins) is three pieces of fabric and one button. Choose two co-ordinating or contrasting fabrics - your choice. Cut a rectangle measuring 9.5" by 12.5" from each of the two fabrics, and one piece 5" by 1.25" from either of the two fabrics.
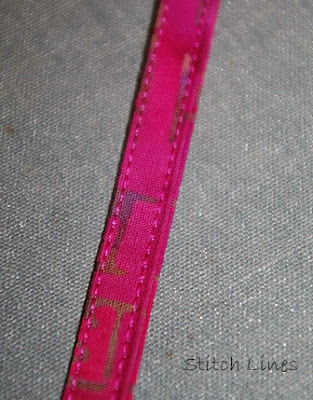
First, let's make the closure tab. Using the 5" x 1.25" piece, fold in half lengthwise, wrong sides together, and crease well. (I press it) Open up and fold each lengthwise edge in to the center (meet that creased line). Press again, then fold in half lengthwise. Your strip should now measure just slightly more than 1/4" wide by 5" long.
Topstitch the folded edges together- your choice to just stitch one side or both.
Bring ends together and stitch across to hold.
Trim the bulk at the corners - I snip off the corner at a 45° angle, then trim just a bit more from the seam allowance on each side of the corner.
Now turn it right side out, through the opening, and press edges well all around, being careful to get right out to the seam. It should measure about 9" x 12". At this point, if you haven't already, decide which fabric you want on the outside. I chose the floral batik as my "outside" and the smaller design batik for the inside.
Take each 9" edge and fold in toward the center (inside) leaving a space of 1/4" to 1/2" in the middle. This will form the pockets.
Insert the tab in the opening, centering it along that pocket, pin. Topstitch both ends, catching the tab in the stitching, to secure. Piece now measures roughly 6" x 9".
With a marking pencil, draw two lines straight across from side to side, dividing the long pockets into three equal sections, approx. 3" wide each.
Stitch on each line, through all thicknesses, creating six pockets.
Insert teabags. I left three peeking out here, so you'd know they are there!
Fold in half lengthwise, then fold up in thirds, from end opposite the tab. Mark placement for button on outside of middle pocket. It is important that teabags are in the caddy before you mark placement for the button, as they "fill it out" and it will be too tight if you placed button when caddy was empty. (Ask me how I know that... lol Yep, gotta move the button on the first one I did...)
It's a little tricky to sew this button on, as you only are sewing through the outside layer- not right through to the inside of caddy. The finished caddy is roughly 3" square, thickness depends on your teabags.
That's it. You're done. This is the first Blog Tutorial I have done, so if you follow these directions to make a Tea Caddy, I'd love for you to leave a comment and let me know how you found it- all constructive criticism and suggestions welcomed!! I should have waited for a brighter day so I could have taken all photos outside, but wanted to get it done today and Ma Nature didn't co-operate, it was a dark dreary day so all photography was done inside. Not the best. Anyway, it's a simple little item for a gift and it doesn't take long. Just what we need these days. Christmas is only 36 days away. Just sayin'....
Peace,
Linda
I cannot count my day complete, 'til needle, thread and fabric meet.


21 comments:
Great gift idea Linda! So many of my co-workers are tea drinkers...most have warded off coffee (not me, though). But I do like an Earl Grey every now and then.
This is a wonderful tutorial! Thank you for sharing :)
Glad to meet our Canadian quilters. Thanks. crystalbluern at onlineok dot com
Thanks for the tutorial , I have made tea wallets but they are slightly different and I will now try out this pattern . Thanks for sharing !
Very pretty. Love the batiks. I do not personally have a use for this right now, but I love the tutorial. Easy to follow and quick to make =)
what a great little gift idea - thank you! Visiting from the West coast, off to poke around some more!
Love, love, love a tutorial as I am a visual learner. Photos and directions are very well written. Much appreciated. If time permits, I may attempt to make some & will give feedback. Lucy
Oh I love this idea and it would make an awesome gift for many of friends back home. I might just try to attempt it...oh me of little sewing experience. The way you have put this tutorial together I think even one as slow as I am about sewing...I think I get it. I have one more knitting project to finish and then I'm going to see about tackling this. Thanks for sharing this idea...it is so perfect !!! I'll let you know the outcome...good or bad. :) Hugs
What a sweet project and something anyone would like to have. It would be good for all of those small pieces of fabric we save. Hugs!
Great tutorial! I was given one as a gift and love it so I will try out your instructions and make a few for gifts for Christmas. Wow, 36 days!
Great tutorial, but now my "to do" list has been totally messed up because I'm going to have to go make one of these! I don't quite have 36 days left - there's shipping time to consider...
Sweet. This is great timing. I might make one of these for my hand quilting buddies. I'll give it a try and let you know how I do. Thanks for taking the time to share with us.
Great tutorial and a great gift idea Linda! I like your fabric choices. Will teabags in the packets fit too?
What a wonderful gift idea! My sister the tea granny would love this. Visiting from BC.
I love this! Thanks!
Great idea, Linda! I have so many scraps of fabric that I could use for this. Thanks for the tutorial.
Thank you! Just discovered your easy-to-follow tutorial on Pinterest. This project will become perfect gifts for three of my tea-drinking friends!
Maybe put teabag in and stitch or mark then stitch and put next teabag in to be sure they fit?!
Yes, you could... but I think most teabags are about the same size..?
I just finished my tea wallet. I love it. I always carry tea when we travel, this will make it so
easy. Directions were easy to follow. Thank you so much. Barbara
You are very welcome Barbara! I hope you enjoy using it!
Good tutorial. Simple, easy project. will be making for gifts and craft fair.
Post a Comment