STITCH LINES...... Ramblings on life as a quilter, stitcher, traveler, photographer, gardener and lover of books, cats and fine chocolate....
Showing posts with label Hexagons. Show all posts

Wednesday, January 23, 2019

Winter Blossom

The winter solstice is long past, and we've survived Blue Monday. Spring is only 56 days away!! Okay, we know it'll be longer than that until spring really appears, but after a much-too-early start to winter, I'm hoping spring will arrive earlier than usual  too... a girl can hope, right?!
As my perennial beds slumber away under their warm thick quilt of snow, I am dreaming of the blossoms to come. Until then, I'll make my own blossoms in my studio. It's the next best thing!

I'm so happy today to be a "detour" on the Island Batik Getaway Blog Hop. If you're visiting here for the first time, as part of the hop, welcome! (I hope you'll linger a bit and have a look around.) If you have no idea what I'm talking about, read on. Island Batik is a manufacturer, importer and distributor of cotton and rayon batik fabrics and hand-printed cottons from Indonesia. (You can read more about the company here.) A number of very talented quilters act as ambassadors for Island Batik - several times a year they receive the new collections of IB fabrics to work with, and each month they show the projects they have created, on their blogs. Twice a year (January and August), there is a blog hop to showcase all these beautiful fabrics and the creations that have been made by the ambassadors. The Island Batik Getaway Blog Hop runs from January 7- February 2. You can read more about it here and see the list of all the participating ambassadors. Be sure to visit each one (yes you can still go back and see all those who have already posted in the first two weeks, it's now into week 3.) Best of all, there are some giveaways so be sure to leave comments to enter!

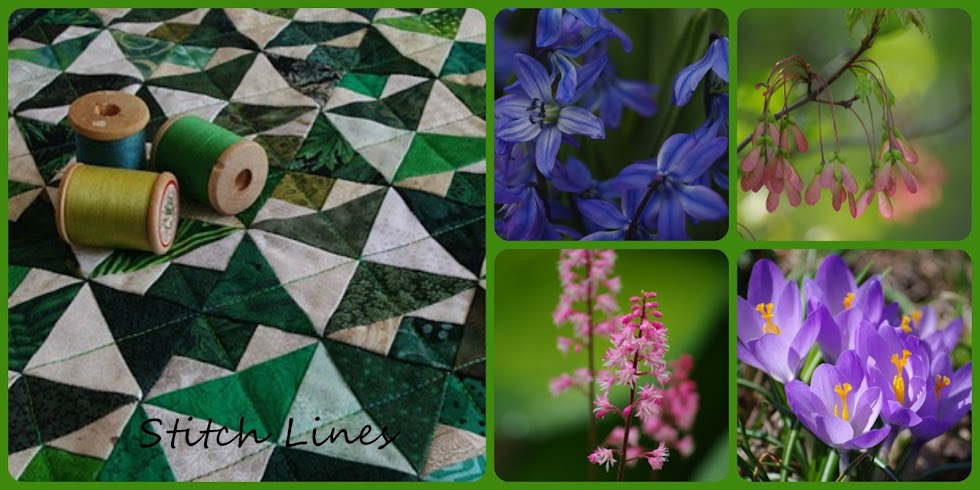
This is the Blossom collection. 

To be very clear, I am NOT an Island Batik ambassador, but my friend Karen at Sew Karen-ly Created IS! Last fall, I asked her what she did with all her leftover batik scraps... "You DON'T throw them OUT, do you?!" I said, with a degree of horror in my voice...  (I cannot understand how anyone could throw out their scraps of such beautiful fabrics, although I know many quilters do... ahem..I may have been known to rescue said beautiful scraps from waste baskets after workshops.) My question no doubt led to Karen asking me several months later if I'd be interested in receiving her scraps from the collection Blossom, which was her assigned fabric collection for this Hop. You see, Karen knows my passion is making miniatures. She told me her plan was to use up as much of the collection as she could, but I was welcome to whatever leftover scraps there were if I wanted to make a miniature from them, and show it on her day of the hop, so that's how this came about. You know I said YES! 
Figuring out my design... one at a time...

The wheels were beginning to turn... Karen told me she was going to do something with the hexagon shape and that the collection was called Blossom. I quickly decided I too would do hexies, not with EPP, but the "modern hexagon" approach. (If that sounds like Greek to you, you can visit a previous post here for an explanation of modern hexagons and how they're done.) Karen is always on the ball, and had a good deal of her piecing done before Christmas so she sent me some scraps in early December. She did send me a few partial shots of her design/partly-put-together quilt which helped with those slowly turning wheels, but I didn't reveal to her what I was planning. 
Masking tape and a ruler's edge keep it all straight.


Then Christmas consumed all my "free time" (Ha! What woman has free time in December?!) and I didn't get going on this until early January. Still with no concrete plan on paper, I set about making little 1/2" hexies. I made about 175, and then started playing with a design. At this point, Karen still had no idea what I was planning, other than using up her scraps. Once I had it pretty well laid out, I asked for more purples and the yellow for centres. Canada Post came through and I had her envelope in a few days (last week.) We do not live in the same province; we're only about 3 hours apart, but neither of us had time to simply "pop by." Finally she sent me a few quick shots of parts of her quilt and I revealed to her my rough design, laid out on my cutting board (photo above.) But she has not seen the end result- she will see the finished quilted miniature this morning for the first time. I can't wait for her response!


So... here it is. I'm calling it "Winter Blossom." It is 12.5" square.
Without a good straight-on shot of her quilt, I tried to do a representation of hers- not identical, as I did not receive scraps of all the fabrics, and had very limited amounts of most. I thought, when I saw her photos, that she had several blossoms "falling off the edge" so I did the same. Turns out I was wrong about hers, but although it caused me a little grief in the finishing, I'm glad I did it this way... adds a bit more interest I think.


Here are the details. The 166 hexies are 1/2" (measured on a straight side) and are 1" in diameter. The overall quilt size is 12.5" square. The hexie fabrics are from Island Batik's Blossom collection, the background fabric which I also used for the backing and the facing, is called Almond, from the Neutrals collection. It is quilted with 50 wt. Aurifil #3840 French Lilac, a beautiful variegated of soft lilac to purple shades.. Love my Aurifil thread!


Whoops! I had already removed some of the tissue paper before taking this photo

My spiral lines, quilted with the walking foot  are 3/8" apart. I googled spiral images and found a clockwise Archimedean spiral which printed out to 1/2" spacing. I wanted 3/8" (the distance from the edge of my walking foot to my centred needle) so I printed it at 75% and it came out just perfect. Whew! I traced the first few rounds of the spiral on white tissue paper, pinned it onto the quilt and stitched through the tissue paper, then just continued keeping the edge of the walking foot along the previous stitching.


Spirals are not hard, but the beginning must be done slowly and carefully to keep the curve smooth. You may be able to see  I used a shorter stitch length at the beginning of the spiral.


I chose to face rather than bind the piece. This was my first time doing a quilt facing! Of course the two "irregular sides" made me stop and think "how do I do this?" I made a prototype first to be sure what seemed so straightforward in my mind would actually work. (It did! :)) Nothing like giving yourself a little extra challenge when you're down to the wire! All stitching was done on my home machine, a Bernina 1260 Quilters Edition.


If you haven't already visited Karen's blog - you will want to see her full size quilt - you can find her here. A big THANK YOU to Karen for persuading me to join in the fun with this blog hop. Bouquets of blossoms to you, my dear! Of course I must say a thank you to Island Batik as well for their wonderful fabrics and to Aurifil for producing such fabulous thread.


Thanks so much for stopping by today, I hope you have enjoyed reading about my little miniature adventure with Karen. I'd love for you to leave me a comment below and tell me where you're visiting from.
EDIT: Check out this post to see the final addition to this Winter Blossom quilt.


Now you must continue hopping along to the next blog in line and that's Leanne at Devoted Quilter. 
She also used the Blossom collection. If you wish to "hop backwards" to visit other ambassadors' Blog Hop posts, you can find the complete list with links here. Have fun!
I am also linking to Linky Tuesday at Freemotion by the River.


Piece,
Linda

"The color of springtime is in the flowers; the color of winter is in the imagination."
~ Terri Guillemets


Saturday, January 19, 2019

Hexie Love

Hello again! Wow, two posts in two days! (See? I'm trying hard!) This last few weeks I've been working hard on a little hexagon project, which you will see next week, I promise! As I was basting these hexies, I remembered that I haven't shown you the last hexie project I completed, a while back. It's just a small piece, 10.5" x 12.5", with no intended purpose.. it's "just because." After all, not everything needs to serve a purpose, right? Sometimes you just want to have fun working on something. In this case, I just wanted to play with this colour combination- turquoise, yellow green and purpley blue. It's  quilted with Aurifil 50 wt. thread, in a light lime green, colour #1231 which ties the colours together nicely. Straight lines passing through all the hexagon points secures them well. 

As you can see, these hexies are not sewn together in the usual way - what's known as EPP - English Paper Piecing. This technique is referred to as "modern hexagons." They are carefully applied to the background with tiny dots of glue on the back at each point, leaving a narrow space between each hexagon as they are positioned, then the quilting passes through each one to secure them in place. I love using Aleene's Fabric Fusion Permanent Fabric Adhesive for this job. It's a permanent washable nontoxic adhesive that dries clear and is flexible. It works well as the "nozzle" has a very fine tip, perfect for tiny dots of glue. Trust me, you don't want gobs of glue oozing out from behind your hexagons.

The hexies are "sized" by the measurement of one straight side - these are 3/4." The diameter, from point to point is double the side's measurement, so in this case, 1.5." You can purchase the papers, or as I do, punch your own. I have three punch sizes - 1/2", 3/4" and 1."  I like to use a paper that is not too heavy, but stiff enough to give me good sharp edges and points when the hexie is pressed. I've been using file cards (recipe cards.) With careful placement, I can get eight 3/4" hexies from one 4x6 card.


The fabric is cut larger than the paper so you have "seam allowance" to turn to the back and thread baste. Nicole at Modern Handcraft has an excellent tutorial on basting the hexagons here, just scroll down to the last video. (This one to the left shows how simply the basting is done, no knots, no double stitches needed for security. This basting is very quick and easy to pull out once the hexie is pressed and the paper removed.)
Once my hexies are all made, I give them a good pressing using Best Press, for good sharp edges and points, then the papers are removed (you can re-use them if you're careful). There is no magic foolproof method for placing them, just care, patience, and a good eye to keep the spacing fairly even. I do use a ruler edge, or a length of masking tape to keep the first row straight.
As I said, I'm finishing up another little hexie project (with smaller hexies!) and I hope to soon get to a much larger hexie project - the fabrics are all gathered and waiting... I need more hours in my day!
Have you done a hexagon project yet? Warning.. they are addictive...

Piece!
Linda

"My 2019 new years resolution is to finish all my craft projects from 2018 that I should have done in 2017, after I started them in 2016 after buying the supplies for them in 2015 with the patterns I found in 2014."  ~ Willowlane Designs.

Sunday, September 25, 2016

A Small Finish

It's a good day to show you a small finish as it's been a while... This is a small piece measuring 10.5" x 11" (I think I'll call it a candle mat) that served a twofold purpose. It was my first experiment with hexagons. These are referred to as "modern hexies" because rather than being hand sewn to each other as is done with English Paper Piecing, they are applied to a background fabric with spaces left between them. They are glued in place with a good quality fabric glue that remains flexible when dry. Then machine quilting passes through them to secure them in place. I chose to quilt a grid through the hexies, passing through each point. This is the second purpose, to serve as another sample piece for my "Quilting with the Walking Foot" class.
Much as I admire EPP, it's not for me, but I do enjoy the "modern hexies." I have another slightly larger piece ready to go, hexies all made and positioned, ready to be glued and stitched, and also fabrics chosen for a much larger piece, made with larger hexagons. It'll be a while before I get to it, but the hexies are something I can chip away at. They are formed over stiff paper hexagons and the folds are held in place with a few hand stitches. Then they are pressed well and papers removed. An easily portable project and great for handwork in front of the tv.
What sort of handwork do you enjoy?

Peace,
Linda

In my perfect world, fabric is free and sewing makes you thin...
Related Posts Plugin for WordPress, Blogger...