
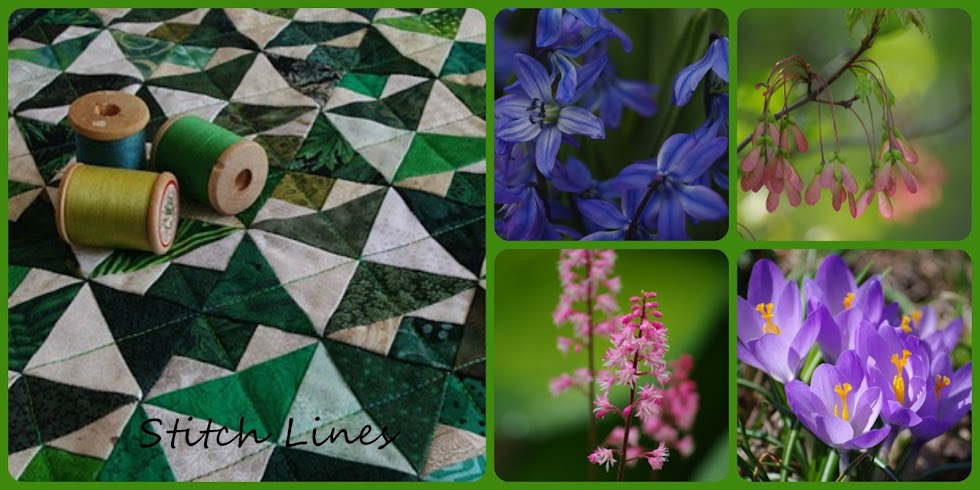
I have finally finished up my Spicy Spiral table runner. I am happy with it, even though it isn't really "my colors". I may give it away to a good friend who has built a new home- it matches her home much better than it does mine... we'll see. I used a fusible batting and I found the perfect green batik with a bit of brown in it for the backing.
How do you finish off something that will not be bound? Do you dislike the "stitch all around but leave an opening to turn it through" method- then you have to try and get a smooth edge where you must handstitch the gap? If so, you might want to try my method.. (Sorry - never thought to take pics, but I'm sure you can do it just from my written description.)

Cut your backing a few inches longer than your "top" and cut it in half widthwise , then join your two halves with a 1/2" seam. I use a fairly short stitch length at each end of the seam, but in the middle section of the seam I switch to a machine basting stitch. (This basted section will become your opening to turn it through.) Press seam open. Now you are ready to layer your project. It must be layered in this order- batting, your finished piece- runner, placemat or whatever on top of the batting with wrong side down against batting, and right side "up", then your seamed backing ON TOP, right side down against runner. So what you have is your two fabric pieces - runner and seamed backing - right sides together on top of the batting. Your seamed backing MUST be on the top or you will not be able to turn it right side out. (I trim the batting to the size and shape of my runner or placemat before placing the backing on top.) Once layered in this order and pinned all around the edge, you carefully open the basted section of the seam with your seam ripper. This is the opening which you will now turn the whole thing through. Stitch entirely around the edge. Trim seam if necessary. On this runner, I trimmed the two pointed ends and notched the curves. Turn right side out and press edges well so that backing does not show on the front. Now all that's left is to close up the opening in your backing with a small neat hand stitch. Because you pressed the seam open, you have two good creased edges to stitch together. (I used my new Clover Black Gold needles for this handsewing- wow- they are just like a hot knife through buttah! Thanks again Jan!!) I really like this method as it ensures a good smooth edge all around your piece, and I don't mind having a seam across the back - who ever looks at the back anyway? I use this all the time for runners and placemats or anything I don't want to do a binding on. Easy Peasy!
Piece,
Linda
"Success in any endeavour depends on the degree to which it is an expression of your true self."
~ Ralph Marston
 I have finally finished up my Spicy Spiral table runner. I am happy with it, even though it isn't really "my colors". I may give it away to a good friend who has built a new home- it matches her home much better than it does mine... we'll see. I used a fusible batting and I found the perfect green batik with a bit of brown in it for the backing.

6 comments:
i might have to give this ago!!
i like it!
Wow!! This looks fabulous Linda & an amazing amount of work. Your friend will be in awe of such a lovely gift.
Nice job on your table runner and very clever way of avoiding that open seam n the outer edge. I will be trying that next time. Thanks!
Linda, that's a beautiful piece and the backing a perfect match. I have used your method before (especially on cicular pieces where it's soooo next to impossible to get that turned in edge perfectly round.) I am really curious as to how you will quilt this?! I know you will have something clever up your sleeve.
A delicious combination of colour.. and the back looks perfect with it..
Hi Linda, I've been away (still am) and missed some of your recent posts. I think this runner is so pretty and unique. Beautiful work! Pam
Post a Comment